
This is the first blog post in the Sitecore Search series, where I'll start off by explaining how you get a Solr instance up and running together with Sitecore 8.x. When you are done going through this blog post, you will have a working Solr instance that can be used from your Sitecore instance.
Which version of Solr should I be using for my Sitecore instance?
The first thing that needs to be considered when setting up your Sitecore 8.x instance to use Solr, is which version of Solr you should be using. Up until recently, the process of deciding which Solr version to use, was mostly based on best-practices from other Sitecore community members, but also a bit of arcane knowledge.
However, this all changed when Sitecore released a compatability table that explains which versions of Solr are supported for any given Sitecore 8.x installation (or at least telling you what isn't supported, and what may require special attention).
I've yet to try out the new Solr 6.x version myself, so if you want to be bold and try that out, please do and let me know in the comment section below, whether or not it worked out for you.
In terms of my recommendation, unless you are forced by some other component in your system, I would recommend going for a 5.x version. I've been using Solr from version 5.1 and up to 5.5 with great results.
Installing Solr
Once you have decided which version of Solr to use along with your Sitecore instance, the next step is to find the specific Solr version and install it.
In terms of installing Solr on your local machine, and then later in the production environment(s), there are two options you can choose from:
- Use the Bitnami distribution that provides an quick and easy one-click install solution for Apache Solr stack.
- Use the Solr binaries from Apache which is a manual installation of everything, but gives you more control in terms of how Solr is set up and what is installed.
If you are new to installing Solr, I would recommend going with option 1, the Bitnami distribution, as it gets you up and running in no time. If you are more experienced, or are installing Solr in a production environment, I'd recommend using Solr binaries from Apache instead.
There is a small caveat to option 1, as Bitnami tends to remove old versions, once they get replaced by newer ones. Since Bitnami doesn't have a download archive, you cannot find and download old versions. This means that if you find a version you like, then you need to make sure that you have a backup yourself, since you cannot rely on the fact that Bitnami will.
For this blog post, I've chosen to use option 1, so any file paths I'll be referring to for the remainder of this blog post will reflect that. If you've decided to use option 2, you should still be able to follow along.
Configuring Solr to be used with Sitecore
When the Solr instance is up and running, the first thing we need to do is to configure Solr to be used with Sitecore - let me warn to you, a fair bit of repetitive work may will occur.

First, copy the basic_configs folder under C:\Bitnami\solr-xxx\apache-solr\solr\configsets\ (where xxx refers to the version of Solr you've installed) to C:\Bitnami\solr-xxx\apache-solr\solr\, such that you end up with C:\Bitnami\solr-xxx\apache-solr\solr\basic_configs.
Next, verify that you have a file named schema.xml under the C:\Bitnami\solr-xxx\apache-solr\solr\basic_configs\conf folder. If you don't have a schema.xml file under the basic_configs folder, you will need to perform these extra steps, as explained in section 2 of the Solr Compatibility Table:
- Create schema.xml file by duplicating and renaming the managed-schema file.
- Switch to
ClassicIndexSchemaFactoryby adding the following line to the SolrConfig.xml file:
<schemafactory class="ClassicIndexSchemaFactory" />
For the last bit, you can basically do a search for ClassicIndexSchemaFactory in the schema.xml file, and there will be an explanation on how exactly you do it.
When you have the schema.xml file sitting in the basic_configs folder, open that file and make the following changes to it:
- Enclose all
<field>and<dynamicField>elements in a<fields>tag. - Enclose all
<fieldType>elements in a<types>tag. - Add the following element as the last child of
<types>:
<fieldType name="pint" class="solr.TrieIntField"/>
Afterwards, save and close the file.
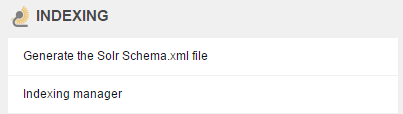
Open up your favorite browser of choice and log into your Sitecore instance. Once logged in, go to the Control Panel and from here, click the "Generate the Solr Schema.xml file" link:
In the dialog that appears, change the source- and target file to point to the newly created schema file (C:\Bitnami\solr-xxx\apache-solr\solr\basic_configs\conf\schema.xml) and click the ‘Generate’ button:
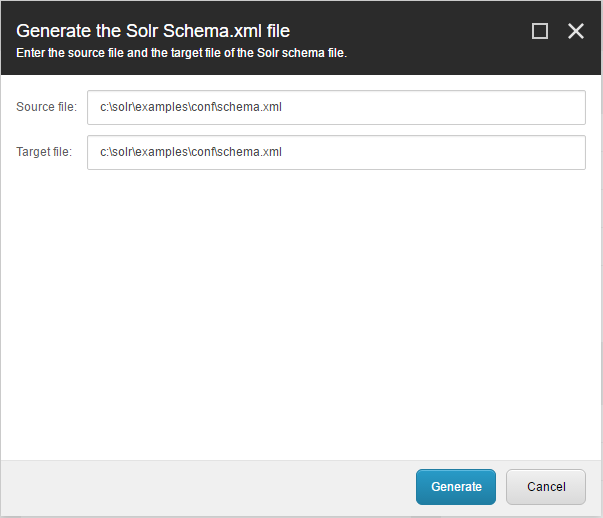
What happens is that Sitecore will create a modified schema.xml file, using the schema.xml file we created as a baseline, and add all of it's Solr specific fields needed for indexing, unique keys etc. Once Sitecore is done generating the schema.xml file, re-open the schema file found under C:\Bitnami\solr-xxx\apache-solr\solr\basic_configs\conf\schema.xml and ensure the stored attribute of schema/fields/field[@name=’_path’] is set to true, like so:
<field name="_path" type="string" indexed="true" stored="true" multiValued="true" />
In addition, as described in the Sitecore community documentation, you also need to make sure that all of the following <dynamicField> elements are added:
<dynamicField name="*_t_bg" type="text_general" indexed="true" stored="true" />
<dynamicField name="*_t_ca" type="text_general" indexed="true" stored="true" />
<dynamicField name="*_t_cz" type="text_general" indexed="true" stored="true" />
<dynamicField name="*_t_da" type="text_general" indexed="true" stored="true" />
<dynamicField name="*_t_de" type="text_general" indexed="true" stored="true" />
<dynamicField name="*_t_el" type="text_general" indexed="true" stored="true" />
<dynamicField name="*_t_es" type="text_general" indexed="true" stored="true" />
<dynamicField name="*_t_eu" type="text_general" indexed="true" stored="true" />
<dynamicField name="*_t_fa" type="text_general" indexed="true" stored="true" />
<dynamicField name="*_t_fi" type="text_general" indexed="true" stored="true" />
<dynamicField name="*_t_fr" type="text_general" indexed="true" stored="true" />
<dynamicField name="*_t_ga" type="text_general" indexed="true" stored="true" />
<dynamicField name="*_t_gl" type="text_general" indexed="true" stored="true" />
<dynamicField name="*_t_hi" type="text_general" indexed="true" stored="true" />
<dynamicField name="*_t_hu" type="text_general" indexed="true" stored="true" />
<dynamicField name="*_t_hy" type="text_general" indexed="true" stored="true" />
<dynamicField name="*_t_id" type="text_general" indexed="true" stored="true" />
<dynamicField name="*_t_it" type="text_general" indexed="true" stored="true" />
<dynamicField name="*_t_ja" type="text_general" indexed="true" stored="true" />
<dynamicField name="*_t_lv" type="text_general" indexed="true" stored="true" />
<dynamicField name="*_t_nl" type="text_general" indexed="true" stored="true" />
<dynamicField name="*_t_no" type="text_general" indexed="true" stored="true" />
<dynamicField name="*_t_pt" type="text_general" indexed="true" stored="true" />
<dynamicField name="*_t_ro" type="text_general" indexed="true" stored="true" />
<dynamicField name="*_t_ru" type="text_general" indexed="true" stored="true" />
<dynamicField name="*_t_sv" type="text_general" indexed="true" stored="true" />
<dynamicField name="*_t_th" type="text_general" indexed="true" stored="true" />
<dynamicField name="*_t_tr" type="text_general" indexed="true" stored="true" />
Once done, save and close the file. The next step is to make a copy of C:\Bitnami\solr-xxx\apache-solr\solr\basic_configs and rename it sitecore_web_index.
Repeat this step until you have a set of config directories with the following names:
sitecore_web_indexsitecore_master_indexsitecore_core_indexsitecore_analytics_indexsocial_messages_websocial_messages_mastersitecore_marketing_asset_index_mastersitecore_marketing_asset_index_websitecore_testing_indexsitecore_suggested_test_indexsitecore_fxm_master_indexsitecore_fxm_web_indexsitecore_list_indexsitecore_marketingdefinitions_master(only Sitecore 8.1)sitecore_marketingdefinitions_web(only Sitecore 8.1)
When you have all the directories in place, navigate to the Solr admin page, in my case http://localhost:8983/solr/, and go to the "Core Admin page":
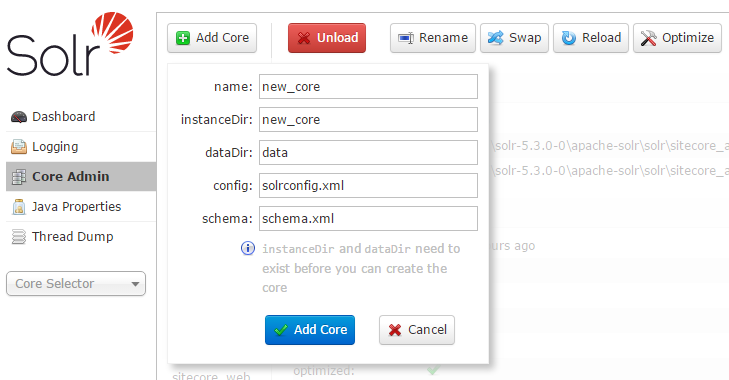
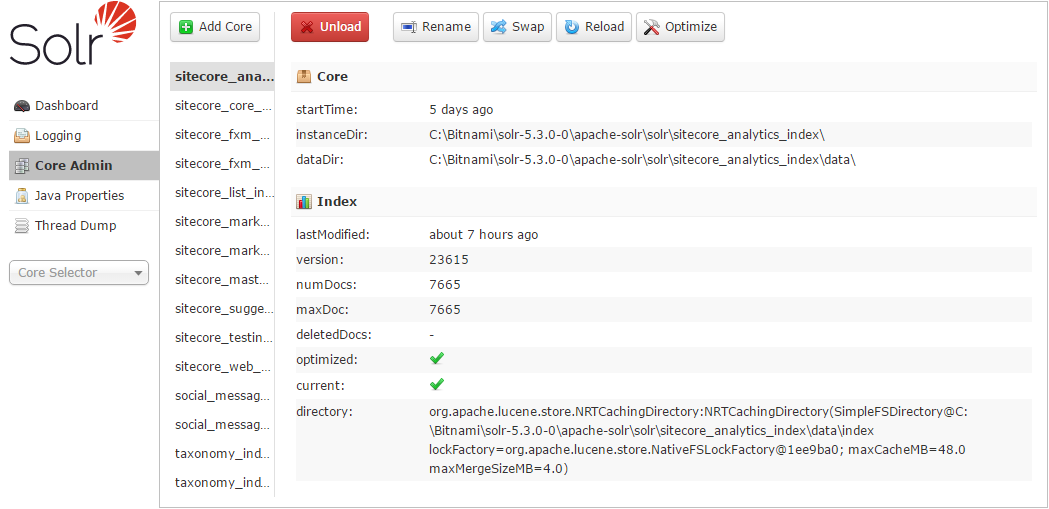
Fill in the 'name' and 'instanceDir' fields with sitecore_analytics_index, and press the "Add Core" button to add the core into Solr. Once done you should be able to see that the core is now present in the list of cores available in your Solr instance.
Repeat this step for the set of config directories created earlier, such that you'll end up with a Solr core for each directory we created:
Congratulations, you are now ready to use Solr from your Sitecore instance - but don't celebrate yet, because there is still a few steps left for us to do.

Configuring Sitecore to use our Solr instance
The last thing that needs to be done is configuring Sitecore to use our newly configured Solr instance.
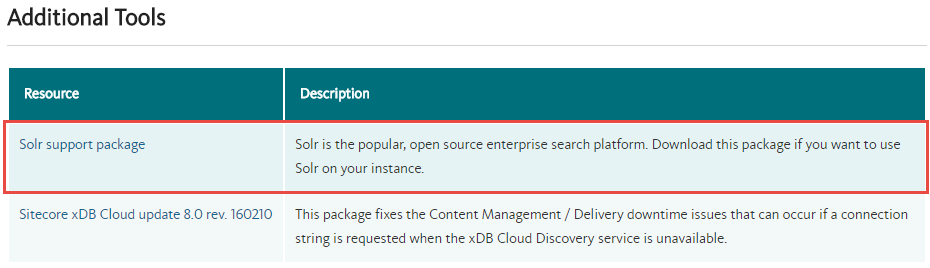
In order to do so, download the Solr Support Package for your update of Sitecore 8.x, found under the additional tools section:
Unpack the package and copy all binaries from the Solr support package's \bin folder to your Sitecore \bin folder. In terms of initializing Sitecore's Solr integration, Sitecore uses Inversion of Control (IoC) to wire this into the application. Out of the box, Sitecore's Solr integration comes with support for a range of different IoC containers, such as:
- Unity
- Castle Windsor
- Autofac
- Ninject
- etc..
You as the developer has to make a choice on which IoC container you want to use. Depending on which IoC container you want to use, you need to make sure that the binaries of that specific IoC container are added to your Sitecore solution's \bin folder.
If you want to use Unity, you can grab the files needed from downloading and installing Unity - the binaries needed will be in C:\Program Files (x86)\Microsoft Unity Application Block 2.1\Bin folder on your machine.
If you choose to use an IoC container that only lives as a nuget package, and you don't have a Visual Studio project set up for your Sitecore solution (where you can install the nuget packages from), then you need to download the nuget packages directly. Once downloaded, change their file extension from .nupkg to .zip, and you'll be able to open and extract the content of the nuget package and grab the files you need. When the binaries are included in the Sitecore \bin folder, all that is left is to wire up the IoC logic by editing the Global.asax to reflect the IoC container to be used - as an example, I've shown how it would look like, if you were to use Castle Windsor:
Then we need to make sure that all Sitecore.ContentSearch.Lucene.XXX files are disabled (has the .disabled naming), where XXXis simply a wildcard for the remaining filename. Additionally, you need to make sure that all the Sitecore.ContentSearch.Solr.XXX files are enabled, meaning that they don't have the .disabled postfix. Both the Lucene and Solr specific configuration files can be found under the www\App_Config\Include folder:
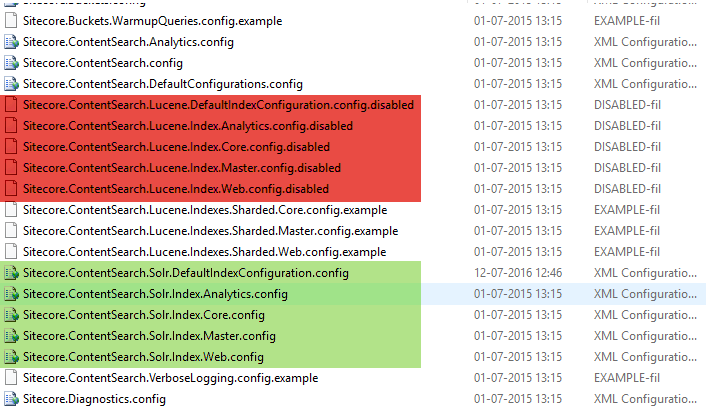
The red highlighted area indicates which files you need to disable, whereas the green highlighted area indicates the files that needs to be enabled.
When the Lucene configurations are disabled and the Solr configurations are enabled, you need to set the connection string in the Sitecore.ContentSearch.Solr.DefaultContentSearchConfiguration to point to your Solr instance. Also, you need to disable Http caching, since there is an issue when using multiple Solr cores and Http Cache. This can be done using a patch file:
Restart you Sitecore instance from the Internet Information Services Manager (IIS), and reload your Sitecore site in the browser. Once reloaded log into your Sitecore instance, go to the Control Panel and from here, click the "Indexing Manager" link.
In the dialog select all search indexes and finally click the "Rebuild" button:

Sitecore will now start rebuilding all of the Solr indexes, which might take a couple of minutes, so hold on tight. Once the rebuilding is done, you are now ready to unleash the powers of the mighty duo, Sitecore and Solr.

Sitecore Instance Manager (SIM) users: A couple of weeks ago, there was a note on the Sitecore Slack channel, mentioning that Dan Solovay had created an enhancement to SIM, which is now part of the official SIM release. The enhancement automates some of the Solr and Sitecore configuration setup, meaning that you can avoid doing some of the repetitive work. However, you'll still need to download and setup the Solr server, verify that all of the additional configuration is correct and at the end perform the index rebuilding - and it currently only supports Solr 4.x.
And there you have it, this is how you set up Solr and configure it to be used along with your Sitecore instance.
If you have any additional knowledge on this subject, comments or questions, please let me know in the comments section below.